CUA50920 – Diploma of Photography and Digital Imaging
Self Paced Online Course
The cutting-edge professional photography courses are written and directed by some of the best working photographers in their field. The aim of the courses is to provide you with the knowledge and skills required for a career as a professional photographer or as a keen hobbyist.
The Professional Photography Courses are delivered online and consist of 12 modules and 12 interactive assignments. You can study in your own time and at your own pace. Students studying the Diploma Course are provided up to 18 months to complete their studies. During this time you will be educated in all aspects of photography by our experienced authors and tutors; who are some of the top freelance photographers around. Their vast wealth of accumulated knowledge is provided to you, along with the ways to apply this knowledge to the areas of photography that most interest you.
The business of photography is not just about award-winning images. It can also be about the right picture at the right time. Newspapers, magazines, and websites worldwide are constantly on the lookout for new and interesting material. The opportunities are enormous and always growing.
The Photography Institute is owned and operated by Online Education Pty Ltd, a Registered Training Organisation (RTO), enabling us to offer you the CUA50920 – Diploma of Photography and Digital Imaging.
Below are some of the key components of our Diploma course:
Accredited with the Australian Skills Quality Authority (ASQA)
ASQA accreditation requires an extensive and thorough process to verify accredited courses are compliant with current government standards.
More In-depth
The Diploma modules and their corresponding assignments meet ASQA criteria, are more in-depth (80% different) and better prepare you for entering the workforce at the end of the course.
Approved Assessors
All of the Diploma tutors are ASQA approved assessors.
Units are integrated through a 12 module course
The author has covered the knowledge and performance evidence for all of the units required to be covered by ASQA. The units covered in our Diploma course can be viewed here. These units have been integrated into our 12 module course in a unique and interactive way that allows the student a cohesive and enjoyable journey.
Course Fee
Flexible Payment Options
- Cutting Edge Diploma Course
- Leading Photographers Contribute Their Knowledge
- 24/7 Support
- Discounts on Adobe products
- Exclusive Facebook Group
- Flexible Payment Options
- Free Website Portfolio To Display Your Work
- 7 Day Money Back Guarantee
- Personal Tutor
 Module 1
- Units Covered
- Equipment Requirements
- Module Exercises & Activities
- Introduction
- Additional Coursework
- Self-Directed Study
- Helpful Documents
- Glossary
- Student Handbook
- Introduction to the Professional Photography Course
- About the Authors
- George Seper
- Yvette Worboys
- Julian Watt
- The Still Image
- The Optical Process
- The Digital Camera
- Camera Overview
- Amateur Cameras
- Smartphone Cameras
- Computational Photography & AI
- Drones
- Point-and-Shoot Cameras
- Micro Four Thirds Cameras
- Bridge and Superzoom Cameras
- Enthusiast vs Pro Cameras
- Mirrorless or CSC Cameras
- The DSLR
- Recent Camera Developments
- Which Camera Should I Buy?
- Camera Features
- Service and Accessories
- End-Usage
- Parts of a Camera
- Camera Body
- Digital Sensor
- Lens
- Shutter
- Memory Card
- Important Features of the Modern Camera
- Megapixels
- Sensor Size
- Frames Per Second (FPS)
- ISO
- Colour Histograms
- Recommendations Regarding Cameras
- Some General Observations on Cameras
- The Pro Camera
- The Small Format Camera
- The DSLR Camera
- The Rangefinder Camera
- A Friendly Caution
- Recent Developments in Small Format Cameras
- The Medium Format Camera
- Small & Medium Format DSLR Features
- Interchangeable Lenses
- Adjustable ISO
- Integrated Light Meters
- Mirror Locking
- Self-Timer
- Digital Image Capture
- Digital Sensors
- CCD & CMOS Compared
- In-Camera Controls & What to do With Them
- RAW
- Adobe 1998 RGB
- sRGB
- Greyscale
- Saturation, Contrast & Sharpening
- Lenses
- Uncovering the Lens
- Lens Overview
- The Science of Lenses
- Focus
- Focal Length
- Aperture
- Angle of View
- Lens Types
- The Normal Lens
- Telephoto Lenses
- Wide-Angle Lenses
- Speciality Lenses & Attachments
- Macro Lenses
- Extension Rings, Tubes & Bellows
- Zoom Lenses
- Reflex Lenses
- Tilt-Shift Lenses
- Lens Faults & Flaws
- Spherical Aberration
- Chromatic Aberration
- Barrel & Pincushion Distortion
- Flare & Vignetting
- Advanced Features of Modern Lenses
- Multi-Coating
- Autofocus (AF)
- Image Stabilisation (IS) or Vibration Reduction (VR)
- Filters
- Polarising Filters
- Neutral Density (ND) Filters
- Taking Care of Your Equipment
- Lenses
- Cameras
- Safe Working Practices
- Safe Work Australia
- Sitting Correctly for Good Posture & Health
- Practical Lens Choices
- Food Photography
- Fashion Photography
- Portrait & Beauty Photography
- Architecture & Interior Photography
- Travel Photography
- Sport & Wildlife Photography
- Wedding Photography
- Assignment 1
 Module 2
- Visual Diary
- The Exposure Triangle
- In-Camera Light Meters
- Digital Histograms
- Reading a Histogram
- Clipping
- Average Reflective Metering
- Scenario 1: Light Scenes
- Scenario 2: Dark Scenes
- Shutters & Aperture
- Shutter Types
- Focal Plane Shutters
- Leaf Shutter
- Exposure Stops
- Shutter Speed Stops
- Aperture Stops
- F/Stop Values
- The Advantage of Using F/Stops
- Full & Third Stop Reference Table
- Relationships & Depth of Field
- What is Depth of Field?
- Depth of Field (DOF) Overview
- Circles of Confusion
- Perceiving Sharpness
- Sharpness
- Depth of Field (DOF) Scale
- Hyperfocal Distance
- DOF Preview Button
- DOF Preview & DSLR Cameras
- DSLR Shooting Modes in Practice
- Manual (M)
- Aperture Priority (AV) or (A)
- Shutter Priority (TV) or (S)
- Program Mode (P)
- Exposure Compensation
- Digital ISO
- Understanding ISO
- Increasing Light Sensitivity
- Digital Noise
- High ISO, Contrast & Colour Distortion
- Auto ISO
- Putting it all Together
- Previsualisation
- Assignment 2
 Module 3
Post-production
Quick and accurate post-production plays a very important role in the photography workflow. This module explores in depth the use of post-production programs focusing on Adobe Lightroom and Adobe Photoshop. This will give the student a comprehensive experience on how to use and apply these programs in a professional manner and as part of their workflow. This module also focuses on digital art and expanding the student’s knowledge of current industry practice.
Units covered in this module:
Note: This list is not indicative of unit completion, as most of our units are taught (in parts) across most of our modules.
CUAPHI523 – Employ colour management in a digital imaging workplace
CUADIG518 – Refine digital art techniques
CUAACD522 – Work with photomedia in creative practice
CUADIG415 – Produce innovative digital images
CUAIND411 – Extend expertise in specialist creative fields
CUAPHI403 – Enhance, manipulate and output photo images
CUAPHI521 – Make illustrative photo images for publication and display
CUAPHI533 – Explore and apply photo lighting techniques
CUAPHI535 – Produce commercial photo images
CUAPHI536 – Provide photographic portrait services
CUAPHI537 – Produce media photo images
CUAPPR511 – Realise a body of creative work
Module Content:
- Units Covered
- Visual Diary
- Post-Production Introduction
- Capture & Editing Software
- Capture One Software
- Adobe Photoshop (Ps)
- Adobe Lightroom (Lr)
- Exposure Software
- Other Image Editing & Retouching Tools
- The Interesting Issue of DPI & PPI
- Image File Size: How Big is Big Enough?
- Computers & Monitors
- Data Storage
- Digital Video Disc
- External Hard Drives
- Raid Arrays
- Solid State Drives
- The Future of File Storage
- Future Proofing Your Files
- Backing Up Your Photographs
- The Graphics Tablet
- Post-Production
- Why Post-Production?
- Why Lightroom?
- Creative Cloud Overview
- Quick Tip: Updates for Adobe Creative Clouds Apps
- Lightroom Classic System Requirements
- Lightroom Help
- Adobe Lightroom
- Lightroom Classic vs Lightroom CC
- Lightroom Classic vs Photoshop CC
- Lightroom Keyboard Shortcuts
- Introduction to Lightroom
- Setting Up Your File Structure
- An Overview of the Lightroom Interface
- Library
- Develop
- Map
- Book
- Slideshow
- Web
- Setting Up Your Catalog, Importing Images & Collections
- Step 1: Creating a New Catalog
- Step 2: Setting Up Your Catalog Settings
- Step 3: Setting Up Your Preferences
- Step 4: Store Presets With This Catalog
- Step 5: Identity Plate Setup
- Step 5: Importing Your Images
- Setting Up Folders in Lightroom
- Collections
- Quick Collections
- Creating a Collection
- Creating a Target Collection
- Smart Collection
- Library Module & Viewing
- Finding Your Way Around
- Understanding the Panels
- Grid View
- Compare Mode
- Loupe Mode
- Survey View
- Lights Out Mode
- Stacking
- Quick Develop
- Virtual Copies
- Before and After View
- Library Module, Metadata & Intro To Tools And Adjustments
- Metadata & Metadata Templates
- Rating, Flag, & Label Options
- Flags
- Labels
- Filter Bar
- Searchable Text Filter
- Keyword Basics
- Keyword Sets
- Keyword List
- Titles and Captions
- Develop Module: Tools & Adjustments
- Snapshots
- History
- Histogram
- Retouching Tool Strip
- Crop & Straighten – How to Crop Images to Specified Size and Straighten Images
- Spot Removal, Right Click & Edit in Photoshop Using the Same Tools
- Red Eye Correction Tool
- Gradient Adjustment
- Radial Filter
- Colour Controls
- White Balance & Eyedropper Tool
- Tone Control
- Greyscale
- Presets
- Creating Your Own Preset In Lightroom
- Develop Module: Advanced Adjustments
- The Adjustment Brush Tool
- Dodge & Burn
- Portrait Retouching
- Masking Tools
- Advanced Greyscale
- Colour Grading / Split Toning & Cross Processing
- Sharpening
- Noise Reduction
- Lens Corrections
- Lens Vignette & Grain
- Transform Tool
- Using Auto
- Calibration
- Workflow
- Batch Processing in Lightroom & Speeding Up Your Workflow
- Copy & Paste
- Match Total Exposures
- Exporting Images (Output Files)
- Exporting for Print
- Exporting for Web Images & Watermarks for Use in Web Images
- Slideshows, Web and Print Modules & Web and Print Output
- Slideshow Module
- Print Module
- Proof Sheets
- Printing Packages
- Web Module
- Web Galleries
- Transitioning Between Lightroom and Photoshop
- Photo Merge
- Working with Photoshop
- Adobe Photoshop for Photographers
- Photoshop Toolbox
- Camera RAW Image Adjustment Basics
- Camera Raw Tools
- Photoshop’s Densitometer
- Selections in Photoshop
- Quick Masking
- Layers
- Adjustment Layers
- Layer Masks
- Retouching
- Sharpening
- Unsharp Mask (USM)
- Traps for Young Players
- One Sharpening Methodology
- Selective Sharpening
- HDR for High Contrast Scenes
- Interpolation
- Digital Art
- Assignment 3
 Module 4
- Units Covered
- Visual Diary
- Introduction
- Light & Its Characteristics
- About Light
- The Properties of Light
- Intensity
- Colour
- Contrast
- Hard Versus Soft
- Direction
- Reflected Light
- The Angle of Incidence
- Specular or Direct Reflection
- Diffuse Reflection
- The Inverse Square Law
- Natural Light
- Love Daylight
- Sunlight
- Natural Light Phenomena
- Magic Hour
- Blue Hour
- Moonlight and Starlight
- Aurora
- Shooting Using Available Light Outdoors
- Magic Hour
- High Noon Shootout
- Fill-In Flash
- Artificial Light
- Studio Flash
- Exposure
- Continuous Lights
- Hot Lights – Tungsten Lighting
- Cool Lights – Fluorescent & LED Lighting
- Fluorescent Lights
- LED Lights
- The Safe Use of Lighting Equipment
- How We Use Light
- Lighting Techniques
- Light Shapers
- Light & Shape
- Lighting Ratios
- Balancing Flash & Ambient Light
- Ambient Light
- Scrims
- Reflectors
- Whatever’s Available
- Flash Duration
- Lighting Glossary
- Assignment 4
 Module 5
- Units Covered
- Visual Diary
- Introduction
- Lighting Equipment
- Speedlights
- Studio Flash
- Floor Packs
- Monobloc Heads
- Flash Accessories
- Hard
- Soft Light Shapers
- Transmitters
- Lighting People
- Photographing People
- Portraiture
- The Basics
- Face Shapes
- Symmetry
- Lighting for Facial Features
- Basic Lighting Positions
- Broad
- Short
- Split Lighting
- Butterfly Lighting
- High-Key Low-Key
- High-Key
- Low-Key
- Silhouette
- Lighting Full-Length & Groups
- Lighting a ¾ and Full-Length Portrait
- Lighting a Group
- Dramatic Lighting
- Rembrandt
- Badger/Krupps Lighting
- Lighting Products
- Product Photography vs Still Life
- Shiny Objects
- Dark Field
- Light Field
- Lighting Locations
- Working with Locations
- Using Colour
- Production Planning
- Conceptualising
- Shot Planning
- The Shoot
- The Wrap-Up
- Assignment 5
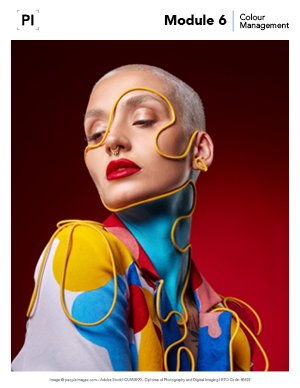 In this module, you will learn the advanced techniques of correct colour management. Colour management encompasses areas of capture, display and output in the imaging workflow and evaluates correct management of these spaces. We will identify and select appropriate calibration devices to create profiles for your system. You will then review this impact on your workflow and amend any areas that need consideration.Units covered in this module:Note: This list is not indicative of unit completion, as most of our units are taught (in parts) across most of our modules.CUAPHI523 – Employ colour management in a digital imaging workplace
CUAACD522 – Work with photomedia in a practice
CUAIND412 – Provide freelance services
CUAPHI403 – Enhance, manipulate and output photo images
CUAPHI521 – Make illustrative photo images for publication and display
CUAPHI536 – Provide photographic portrait services
In this module, you will learn the advanced techniques of correct colour management. Colour management encompasses areas of capture, display and output in the imaging workflow and evaluates correct management of these spaces. We will identify and select appropriate calibration devices to create profiles for your system. You will then review this impact on your workflow and amend any areas that need consideration.Units covered in this module:Note: This list is not indicative of unit completion, as most of our units are taught (in parts) across most of our modules.CUAPHI523 – Employ colour management in a digital imaging workplace
CUAACD522 – Work with photomedia in a practice
CUAIND412 – Provide freelance services
CUAPHI403 – Enhance, manipulate and output photo images
CUAPHI521 – Make illustrative photo images for publication and display
CUAPHI536 – Provide photographic portrait services- Units Covered
- Visual Diary
- Introducing Colour
- The Colour Spectrum
- Colour Temperature
- Early Colour Theory Development
- Maxwell’s Triangle & Modern Colour Theory
- Colour Spaces
- Additive & Subtractive Colour Systems
- The CIE & LAB Colour
- Managing Colour & Digital White Balance
- Custom White Balance
- A Colour Reality Check
- Seeing Like a Camera
- Colour Perception
- How Do You See Colour?
- Adobe Colour Wheel
- Colour Management In-Camera
- Adobe RGB (1998)
- sRGB
- ProPhoto RGB
- Grey Spaces
- Dynamic Range
- Calibrating Your Camera
- Using Your Data Colour Checker or X-Rite Colour Checker
- Colour Management Monitors
- The Calibration Device
- Calibrating Your Monitor
- Your Workspace
- Work In RGB
- Gamma
- Gamut
- Gamut Warnings
- The CMYK Colour Space
- Bit Depth
- Colour Channels in Photoshop
- Colour Management ICC Profiles & Rendering Intents
- Output Devices & Resolution Requirements
- Photo Quality Inkjet Printers
- Offset Printing Press
- Lines Per Inch & DPI Conversions
- The Professional Print Lab
- The Web
- Dot Gain
- File Formats for Digital Imaging & Printing
- Camera RAW
- DNG
- JPEG
- Print-Bound Images
- PSD Photoshop’s Default File Format
- TIFF
- EPS
- GIF
- JPEG 2000
- Other Random File Formats
- Working With 16-Bit Files
- Converting 8-Bit Images to 16-Bit
- 16-Bit Editing
- Do Your Prints Look Like the Screen Image?
- Soft Proofing
- Professional Labs and File Preparation
- Pixel Perfect – Soft Proofing
- Printing on a Photo Printer
- A Final Word
- Assignment 6
 Module 7
- Units Covered
- Visual Diary
- Introduction
- Business Planning
- Photography as a Business
- Hobby or Business
- Planning
- Business Plans
- 5-Year Goal Plan
- SWOT Analysis
- Exploit Strengths
- Reduce Weaknesses
- Seize Opportunities
- Diminish Threats
- Profit vs Loss
- Cost of Doing Business & Fees
- Return on Equity
- Rule of Thirds
- Evaluating Opportunities
- Will I Love It?
- Do You Have the Capability?
- Is There a Market?
- Are There Existing Relationships?
- What is the Financial Potential?
- What are the Challenges?
- Is the Answer No?
- Evaluating Commercial Risk
- External Risk
- Internal Risk
- Assessing Risk
- Probability
- Impact
- Risk Mitigation
- Cost Management
- Debt
- Return on Investment
- Profit Margin
- Buy vs Rent
- Business Setup
- Setting up a Business
- Structure
- Sole Trader
- Company
- Partnerships
- Trusts
- Business Names & ABN
- Domain Names & Email
- Insurances
- Customers
- Finding & Retaining Customers
- CRM
- Networking
- Industry Bodies
- Identify New Business Opportunities
- Target a New Client Base
- Revenue Streams
- Marketing
- Branding
- Reputation
- Marketing Strategy
- Direct Marketing
- Social Media
- Content Marketing
- Email Campaigns
- Contracts
- Contracts
- Terms of Trade
- Pricing
- Copyright
- Location Permits, Model & Property Releases
- Price Lists, Estimates & Invoices
- Negotiating
- Attitude
- Successful Negotiation
- Blake Discher’s Negotiating Quick Tips
- Debt Management
- Professional Advisors
- Financial Management
- Software
- Tax and GST
- Superannuation
- Record-Keeping
- Professional Development
- Competitions
- Assignment 7
 Module 8
- Units Covered
- Visual Diary
- What is Visual Communication?
- Advantages of Visual Communication
- Disadvantages of Visual Communication
- Styles of Communication
- Elements of Design
- Line
- Line Character
- Line Within Images
- Shape and Form
- Shape Within Images
- Lighting for Shape
- Implied Shape
- Shape in Images
- Tone
- The Role of Tone in Composition
- Controlling Tone Range
- Tone in Images
- Texture
- Texture in Photographs
- Volume
- How to Create Volume in an Image
- Ways of Representing Volume
- Linear Perspective
- Diminishing Perspective
- Aerial Perspective
- Tonal Perspective
- Colour Perspective
- Sharpness
- Colour
- Primary Colours
- Secondary Colours
- Complementary Colour
- Analogous Colours
- Monochrome Colours
- Warm and Cool Colours
- A Final Word on the Elements of Design
- Principles of Composition
- Centre of Interest & Dominance
- Compound Centre of Interest
- Isolating the Topic
- Golden Ratio
- Golden Mean & Rule of Thirds
- Negative Space & Reverse Dominance
- Balance
- Formal Balance
- Informal Balance
- Unity
- Contrast
- Contrast of Mood
- Rhythm
- Rhythm Through Repetition
- Interval Repetition
- Gradation
- Harmony
- Discord
- Elements and Principles – A Final Word
- Visual Communication Used by the Masters
- Garry Winogrand
- Dorothea Lange
- Henry Peach Robinson
- Yousuf Karsh
- Nan Goldin
- Media & Visual Communication
- Printed Media
- Magazines (Printed)
- Magazines (Online)
- Social Media Advertising
- Meaning & Context in Visual Communication
- What is Content & What is Context?
- Erik Johansson
- Bill Diodato
- Irving Penn
- Aleksandra Kingo
- Uwe Duettmann
- Visual Communication Used in Propaganda
- Robert Capa
- Nick Ut
- Eddie Adams
- Kevin Carter
- Malcolm Browne
- Jeff Widener
- A Final Word
- Assignment 8
 Module 9
- Units Covered
- Visual Diary
- Think Creatively
- Research Contemporary Photography Sources
- Research Historical Creative Photography
- Timeline of Photography
- The Genius of Photography
- Traditional Process in Modern Creative Practice
- Tim Gibbs
- David Hockney
- Craig Tuffin
- Stephen McNally
- Adrian Cook
- Conceptualising the Potential of Photomedia in Your Own Work
- Interview with George Byrne
- Experimenting with Photomedia in Your Own Work
- How a Body of Work Evolves
- Experimenting Digitally
- Tools of the Trade
- New Technology: AI, CGI, Computational Photography
- AI (Artificial Intelligence or Machine Learning)
- CGI (Computer Generated Images)
- Computational Photography
- Developing Ideas From Experimentation
- Experiment with Tools
- Refine Ideas Through a Process of Experimentation
- Double Exposure
- Cinemagraphs
- Timelapse Photography
- New Editing Software Solutions
- Review Work in Progress
- Evaluate Finished Work for Intended Purpose
- Plan & Organise the Production of Creative Work
- Steps in a Process
- Planning & Collaboration Tools
- Set Up or Gain Access to an Appropriate Workspace
- Develop a Realistic Timeframe for the Production of Work
- Evaluate & Respond to Project Constraints
- Monitor Project Workflow Against the Plan
- Working with a Team
- Budgeting
- Intellectual Property Considerations
- Principles & Rules of Copyright
- Moral Rights
- Copyright Resources
- Create & Present a Body of Work
- What is a Body of Work?
- How to Create a Body of Work
- Create & Present a Body of Work & a Portfolio
- Soft Copy Portfolio
- Hard Copy Portfolio
- Books
- Website Portfolio
- Develop Your Own Presentation Style
- Document Your Work from Initial Ideas to Project Completion
- Evaluate Your Work
- Review Work in Progress Against Personal, Professional & Artistic Objectives
- Responding to Constructive Feedback
- Objectively Evaluate Your Own Work
- Video Resources
- A Final Word
- Assignment 9
 Module 10
Commercial Photographic Services
In this module, we will explore how to interpret a commercial photography brief. You will learn how to research styles and conceptualise aesthetic approaches to specific job requirements. You will learn how to prepare job estimates and how to apply a creative fee for your time and effort. You will prepare terms and conditions, budgets, quotes on shooting (against your initial estimate), make an agreement and complete your contract. We will investigate codes of practice, licensing and permit requirements for commercial shoots. Then, you will apply this knowledge to the stock photography industry and create a body of work for a stock agency.
Units covered in this module:
Note: This list is not indicative of unit completion, as most of our units are taught (in parts) across most of our modules.
CUAPHI523 – Employ colour management in a digital imaging workplace
CUAACD522 – Work with photomedia in creative practice
CUADIG415 – Produce innovative digital images
CUAIND412 – Provide freelance services
CUAPHI312 – Capture photographic images
CUAIND411 – Extend expertise in specialist creative fields
CUAPHI403 – Enhance, manipulate and output photo images
CUAPHI521 – Make illustrative photo images for publication and display
CUAPHI531 – Apply visual communication theory to photo imaging practice
CUAPHI533 – Explore and apply photo lighting techniques
CUAPHI535 – Produce commercial photo images
CUAPHI536 – Provide photographic portrait services
CUAPHI537 – Produce media photo images
CUAPPR511 – Realise a body of creative work
CUAPPR414 – Develop self as artist
Module Content:
- Units Covered
- Visual Diary
- Introduction
- Genres
- Product
- Product Photography for Advertising
- E-Commerce
- In Context
- Corporate
- Portraiture
- Events
- Social Media
- Annual Reports
- Time-Lapse
- Case Studies
- Advertising
- Architecture & Real Estate
- Domestic Real Estate
- Architectural
- Portraiture
- Domestic Portraiture
- Specialist Genres
- Portrait Workflow
- Portrait styles
- Copyright & Contracts
- Working With Domestic Clients
- Product Sales
- Retouching
- Corporate Portraiture
- Headshots
- Environmental Portraits
- Retouching
- Advertising & Editorial Portraiture
- Advertising
- Editorial
- Media Photographers
- Celebrities
- Humour
- Heroic
- Animals
- Pre-Production
- Photographer’s Treatments
- Mood Boards
- Production Scheduling
- Call Sheets
- Equipment Lists
- The Shoot
- Studio
- Shooting Tethered
- Location
- WHS
- WHS In the Digital Age
- Time Management
- BTS
- Post-Production
- Ingestion
- File Processing
- Batch Processing
- Proof Delivery
- Retouching
- File Delivery
- Digital Asset Management
- DAM What & Why
- Hazards
- Hardware Failure
- Human Error
- Software Corruption
- Computer Malware & Hacking
- Natural Disasters
- Workflow
- Backup Strategies
- Backup Software
- Recovery Software
- Hardware Solutions
- Archiving
- Assignment 10
 Module 11
- Units Covered
- Visual Diary
- Introduction
- Selecting a Speciality Area
- Fashion & Beauty
- Portraiture
- Weddings & Family
- Nudes, Boudoir & Glamour
- Photojournalism
- Landscapes, Travel & Resort
- Food
- Product & Still Life
- Architecture & Interiors
- Art Photography
- Industrial & Corporate
- Cars
- Real Estate & Drones
- The Photographer’s Assistant
- Plan Strategies to Improve Your Practice
- Continuing Education
- Identify Opportunities for Growth
- Finding a Mentor
- Opportunities for Growth Through Networking
- Trade Shows
- Industry Conferences
- Unforeseen Opportunities
- Peer Groups
- Volunteering
- Develop Your Own Style
- Evaluate Your Work
- Pursue Work Opportunities
- Artist Statement
- Curriculum Vitae
- Resumes
- The Freelance Resume
- Resume Objective
- Education
- Work Experience
- Skills
- Achievements
- Promotional Material
- Press Releases
- A Final Word
- Assignment 11
 Module 12
- Units Covered
- Visual Diary
- Introduction
- Where do you want to pitch your business?
- What do you want to do?
- Where and How to Pitch
- Presentation Options
- Audience
- Portfolio boxes
- Custom Portfolio Books
- Printed Books
- Online Options
- Design
- The Importance of Design
- Researching Competitors
- Your Corporate Identity
- Your Style
- Your Values
- Your Target Market
- Visual Style Guide
- Layout
- DIY Design
- Outsourced Design
- Bidding Sites
- Contra-deals
- Design Students
- Budget Implications
- Copyright Implications
- Design Implementation
- Scheduling
- Budget
- Image Selection
- Image Layout
- Image Flow
- Proofing
- Feedback
- Industry Professionals
- Mentors
- Experienced Clients
- Peers
- Copyright Protection & Clearances
- Presentation
- Create Presentations
- Present Work
- Wedding and Portrait Photographer
- Advertising, Commercial and Editorial Photographer
- Fine Art and Décor
- Seek Feedback
- Evaluate Presentation
- Finalise Presentation
- Assignment 12
Registration Code - 45423
The Photography Institute offers you the most advanced and comprehensive online solution to learning available today. We offer the most thorough home study course in photography using the very latest online learning techniques. Our commitment to providing the highest quality training program has resulted in unique teaching and student support systems, which produce unparalleled results
THE AUTHORS
Know more about the authors.

GEORGE SEPER
George began his photographic career in New York City in the early 1970s and has gone on to forge an illustrious career where his work has appeared in countless publications worldwide.

YVETTE WORBOYS
Yvette Worboys has been authoring and teaching photography in the Australian VET sector since 2008 and has been published and exhibited over the last 15 years both nationally and internationally.

JULIAN WATT
Julian is an established, conceptual advertising photographer, that has won many international awards. Julian also has many years of experience authoring and tutoring materials in the Australian VET sector.
OUR TUTORS
Our handpicked tutors are not only great teachers, but experts in their fields.

YVETTE WORBOYS
Yvette has over 20 years of experience in both graphic design and photography with interests in the arts from an early age.

Julie Crespel
Based in Sydney for over 20 years and with a long-standing career across editorial and commercial sectors, she is widely regarded for her personable approach, creative versatility, and consistent professionalism.

GEORGE SEPER
Internationally respected, George Seper has been photographing food for over 30 years

JULIAN WATT
Julian is an established, conceptual advertising photographer based in Sydney, Australia. Clients work with him because he’s versatile, a wizard with light, has never had to do a reshoot and always makes it look easy.
Accreditation
We are accredited and recognised by


Testimonials
Take a moment to read some of our graduate testimonials.
Let Us Call You
Complete the form below and we will get back to you as soon as possible
The courses are designed to be self-paced. For the Diploma Course, you would expect to dedicate, as per AQF standards, approximately 16 hours per week of structured and non-structured training over an 18 month period. Students studying the Diploma Course are provided up to 18 months to complete their studies.
The course is completed online. This means there are no classes to attend. You can study in your own time and at your own pace
To successfully engage with the course requirements and have a capacity to complete activity
and assignment tasks, you are required to own or have access to the below listed equipment.
We have listed the modules by which you will need the equipment, so that you may purchase
or hire the equipment as you progress through the course, if preferred.
Some items outline a specific brand that is required. For those that don’t, you may use your
preferred brand.
For any items that you don’t already own, and are unable to find a suitable hiring option, we
recommend purchasing them in either new or second-hand condition, then, if you don’t want
to keep them as part of your kit, reselling after you complete the course.
Equipment Requirements
Module 1 (onward):
- A 35mm DSLR or Mirrorless (CSC) equivalent that has detachable lenses and can have accessories attached to it
- Lens equipment needs to include a wide angle, 50mm focal length and a medium
telephoto. A standard zoom for your camera such as a 24-105mm lens or a 24-70mm would cover the focal lengths needed - A computer that is capable of running Adobe Software with a minimum of 16GBs of
RAM - Adobe Creative Cloud: Photographer’s package
Module 2
- A Tripod
Module 3
- Hard drive/s and a backup system
Module 4
- Speedlite that can be operated off camera
- Reflector/s (handheld)
Module 5
- At least one Studio Flash or another Speedlite Trigger, Reflectors, one Umbrella and/or one Softbox. Note: We recommend Godox units that can be used concurrently.
For instance, a Godox speedlite and a Godox AD400 or 600pro battery powered
studio flash. Godox do make cheaper AC powered studio flash that are very cheap,
however this limits the ability to use them outdoors. Ask your tutor if you have any
doubts. - Polyboard (or Foamcore) in black and white, A2 size (enough for a small home studio set up)
- Welding clips (enough for your setup)
Module 6 - A Spyder or X-Rite monitor Calibration system
- An X-Rite ColorChecker Passport or Spyder CheckR
You can contact your tutor at any time through our secure student site, which you will gain access to once you enrol. Your tutor’s role is to assess your assignments and provide you with feedback. They are also available to answer any questions you may have about the course.
As part of the CUA50920 – Diploma of Photography and Digital Imaging, there is an
entry requirement for eligible applicants to successfully complete a preliminary
assessment.
This will require you to produce a portfolio of digital imaging work that demonstrates
the application of technical skills and knowledge equivalent to Australian
Qualifications Framework (AQF) level 4 or above. Skills and knowledge may have
been acquired through experience or formal study.
Please note, that a preliminary assessment is not required if you have attained a CUA41115 –
Certificate IV in Photography and Photo Imaging (or equivalent), and present a transcript of this after
enrolment.
As the course is provided online, you have the flexibility to start when and where it suits you. If you enrolled today, for example, you could start straight away
All the learning is done online in that when you enrol, you receive a username and password, which enables you to log onto our secure student site. From there, you can download your first module, which you could liken to your textbook as it contains all the information you will need to complete assignment one. Each module is approximately 90 pages in length and is full of detailed, technical information delivered in a friendly, conversational manner that is easy to understand. The concepts are further explained by way of diagrams, images and examples. Once you have completed your assignment (some are just theoretical, but the majority of assignments combine both theory and fun practical tasks), you then upload it onto our site for your tutor to mark. The tutors will give you a grade (out of 10) and a comprehensive evaluation of your work and ideas. Their feedback will help nurture and improve your skills each step of the way.-


 Module 1
 Module 2
 Module 3
 Module 4
 Module 5
 Module 7
 Module 8
 Module 9
 Module 10
 Module 11
 Module 12


